Showing posts with label Decor. Show all posts

Tuesday, January 24, 2012

Holiday Tour 2011...just a teensy late


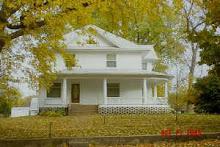
Did you hear? Our home was included in the Clarence Friends of the Library 2011 Holiday Home Tour.  The preparation is nothing short of a type of torture that I'm SURE has been outlawed by the Geneva Convention.  HOWEVER, the benefit is that all those nagging little (and big) projects that had been hanging out there in la la land got DONE.  Go grab a snack, a drink, and some toothpicks to keep your eyes open as you peruse the next 30 something photos of the house....in all its CLEANESS.  Did I mention I have an eight year old boy, a four year old boy and a 35 year old boy?  They all live here...at the same time....at the same time I had to keep the ENTIRE house clean.  I deserve a trophy for that.  Or a tiara.


Have I mentioned how much I love my kitchen now?  I'm going to share that love AGAIN soon in a Before and After post.   


The dining room.  I managed to hide my oakey oak dining room table...the hubster put the kabosh on painting or staining it.   Little does he know the plans afoot when he leaves on his next business travel overseas.  BWAHAHAHA.


Hedge apples....just because they're cool. 


God bless my husband and friend for lugging the cabinet out of the basement.  I love this thing.  Love.  The weight...well....just shy of elephant.


The $1 chair.  More on that to come too....I'm such a tease. 


So here's the deal.  When a person hides their oakey oak dining table...well...you have to do something about those oakey oak dining CHAIRS.  Solution?  Hide them in the basement and scrounge the house.  I kinda love the bench there.  That might stay...at least until I find permanent "new" chairs.  Actually what I would sorta totally love is to have mismatched...just all in the same wood tone....or painted....


The den....because my dad is a genius bookcase builder.  Love that guy.


Master bedroom. Makes me want a nap.


Guest room.  Uh yes, I'm a ding dong and this is the only shot I took.


Back to being a tease.  This is the new downstairs bath....that deserves its own post.  Its own blog really.  Its own country to run to be honest.


Back stairs.  Do I have a photo of the beautiful front stair case and foyer tree you ask?  Uh no.  Woops.


Upstairs bath.  Artwork by a very famous artiste named Marshall V.  He was two.  Genius. Pure genius.


Boys' room


If you're still awake I thank you for taking the time to go through my virtual Holiday Home Tour. Oh, it's January you say?  Just pretend it's Dec. 25 and you're delighted to look at Christmas photos. ;-)

Sunday, April 25, 2010

Free Organization!

This is the beginning. The beginning of a little boy room remodel. My boys have informed me they would like their room to look different...more "big boy". I've had this free free cheap cheap project rolling around in my brain ever since, because let's face it....boys need organization!


We started with this. Target diaper boxes (which we are finally almost done with...YAY!!) I used cloth diapers with both my boys...until my youngest decided to get ENORMOUS before he was potty trained...and I couldn't justify buying the whole next size in cloth for just a few months. We have also been organizing closets and getting rid of t-shirts that are GINORMOUS (do you remember the '90's?) They came in VERY handy for this project!!!


First I taped the box flaps down inside the box.


Cut the t-shirt into pieces to cover the box.


Sew it all together, stretch it over the box, add a felt star and VOILA! Super cute, FREEEEEEEE organization! I have three more boxes to cover and add to their "big boy" room! These boxes are really sturdy and could be covered in ANY fabric to match any decor! Go crazy! :-)

I also snatched up a FREEEE set of lockers on Craigslist....
I'm seeing a theme developing here. ;-)
I'll show updates as they happen!

Oh! And don't forget to enter my basket giveaway HERE!!!!

Linking up to:
Metamorphosis Monday at Between Naps on the Porch

Tuesday, April 20, 2010

The Little Birdies Have Landed

Welcome home little birdies! Do you remember a few days ago I mentioned I was super lucky enough to win these little guys from Michael's giveaway over at Inspired by Charm?
Today was the big day of their arrival!! And let me tell you, they arrived IN.STYLE. I totally should have taken a photo of the box and packaging...it was so pretty! If I hadn't torn into it like a wild dog at the meat market I could have shown you. Beautiful handwritten label, note, GORGEOUS baker's twine wrapping the birds into their pink tissue blankets.

I think the birdies like their new home.
And as if I wasn't feeling like the luckiest girl on earth already.....Michael was kind enough to include this box of Goblin Chocolates as a little extra.
Combine two little boys, a surprise box of THE.MOST.DELICIOUS.CHOCOLATE.EVER, and a mommy trying to take photos of said chocolate.....not a pretty scene people. They were VERY happy when the chocolates' photo shoot was over and they could dive in. Thanks Michael!!


The boys were so sweet with our new porch friends.....our oldest told our youngest to "be very careful with the birdies. Mommy loves them and she would be sad if they broke." He's so kind.


Aren't they just the cutest thing ever?


Welcome Summer!!

Sunday, April 18, 2010

Monogram Window Tutorial

Please ignore the GIANT reflection in this photo...it was just that time of day.
I've had some REALLY nice comments about the monogrammed window on my springtime mantel. SO....I thought I'd share a quick little tutorial! This is a really quick, really easy project for big impact. I like that....easy and big. ;-)

First find a design you really love...it can be ANYTHING. I use Microsoft Publisher to do everything, so I copied the image I found into Publisher, sized it to my window, inversed the image (this is important), then printed it out. Here's a little tip....you don't need to print it out in black, just do it in light gray. SAVES INK!!! Did you know printer ink is the single most expensive fluid on earth? My husband told me that, so I'll just take it as fact.


When you have your pages lined up, tape them all together and trim the whole show to fit inside your window frame.


Find a really dirty, really old FREE window.


The dirtier the better.
Be sure to clean clean clean your dirty dirty window.
Windex the heck out of this puppy.


This is the only part that might be confusing. When your window is nice and clean tape the image onto the side of window that you want to see as your final result. My window was stained wood on the good side, painted wood on the other. I wanted the stained side to show, so I taped my image to that side, so that I could see the inversed image through the window.

When your image is placed the way you want it, paint away! I used Folk Art acrylic craft paint in a nice turquoise color. Don't get too caught up in making everything perfect. Focus on nice brush strokes and clean lines.

It's best to paint on the back side of the window because the finished result is a nice smooth image through the glass. You can paint on the front of the glass if you prefer, but I like the smooth look behind the glass.


Paint over your image a few times to get a nice opaque coverage.
Remove the paper from the window. Flip over your window.

There you have it, a pretty (easy) monogrammed window!


Linking to:
Metamorphosis Monday at Between Naps on the Porch

Thrifty Treasures at Southern Hospitality

It's So Very Creative at It's So Very Cheri

Trash to Treasure Tuesday at Reinvented

Related Posts with Thumbnails