Thursday, December 31, 2009

Oh Cricut, How I Love You, Let Me Count the Ways

Santa brought me a Cricut....HE BROUGHT ME A CRICUT. Okay, I realize it was my husband....doesn't he rock? And listen....HE LISTENED TO ME!!! I've been pining over the Cricut Expression for months...and now it's mine ALL MINE. Oh Cricut, how I love you....look how pretty you made my Christmas extravaganza organization. All those perfect snowflakes...you cut them so effortlessly while I check my email.

We're going to make a great team.

I'll keep counting......check back later.

Wednesday, December 30, 2009

A Gift for Our Favorite Teacher

Do you ever have those moments of self realization when your mind bends around the concept that you are, indeed, a total ignoramus? A moment of pure "I must have lived under a rock with a pair of REALLY fuzzy earmuffs on for a little too long?" That is precisely where I found myself upon realizing that gifts are bequeathed to Sunday School teachers (of which I am one for the first time this year) during the holidays. This realization came about 2 years too late to save my poor child from the embarrassment of NOT BRINGING A GIFT to his teachers the past two years he's been in Sunday School. Because of his ignoramus, rock abiding mother, he didn't bring a gift.

SO....in an effort to remedy said embarrassment I was determined to set things right when it came to his KINDERGARTEN teacher. We were going to come up with something special for his very special teacher. And here we go......


The journal jar. A cute little idea found over at Inspired PaperTreyInk
I copied it, I admit it...or at least the best I could without the fancy kit and paper, etc, etc. I'm a DIY girl dontcha know?

In the jar's former life it held a FABULOUS mustard from the Mustard Museum in Mt. Horeb, WI.....but I digress.

The jar is filled with little curly pieces of paper (A LOT of curly pieces of paper, so many in fact I'm a little nervous that upon opening said jar for the first time Mrs. S may have been doused by an exploding array of tiny curly papers) with a question or something to think about for a journal entry...most were focused on a teacher's life....ie...what made you want to become a teacher? etc.

Matching journal.

All packaged up and ready to deliver.

Someday I'll catch on to all my motherly duties. Slowly but surely.

Wednesday, December 16, 2009

We'll Call Him Bob

This is what happens when a thrifty gal wraps gifts all afternoon, runs out of four rolls of wrapping paper and has four empty tubes staring at her. The tubes say to this thrifty gal, "We would look great as tall skinny fabric covered Christmas trees. We just need a little help from the glue gun and about seventy bajillion strips of assorted fabrics."

I answered the call and here we have it. The tree we call Bob. Bob needs friends I've decided....maybe a Joe and a Frank....Bob needs a medium friend and a small friend. Green and brown friends to be exact. Hoping to have these friends done in the next few days.....maybe I'll even (GASP!!!) post a tutorial.

Happy wrapping! :-)


Friday, December 11, 2009

Happiness is.....

...my favorite Christmas socks...they have reindeer on the sides WITH jingle bells...so I jingle while I work. ;-)


Choosing the perfect Christmas tree with three of the most perfect boys.

...chocolate donuts on the way home from the tree farm....a new family tradition.

...snow angels on a VERY FIRST SNOW DAY!!!

...being able to hang with big brother ALL DAY on that very first snow day.

Sunday, December 6, 2009

Dry Erase Can Be Beautiful!

Dare to DIY

We're daring again! This was a bigger bit of a dare than the previous weeks.....as most of my readers are my gift recipients!! So.....I chose the ONE gift that will soon find it's way into the home of my dear friend who I'm almost positive doesn't read my blog!! :-) If you're reading this Jamie....SHUT OFF YOUR COMPUTER, TURN AWAY, RUN FROM THE ROOM!!


Now, back to the party! I mean it Jamie....don't read any further!!


This project was so fun and one of my favorites! I've already put this on my list of "to make for myself when I have time." A dry erase calendar, family monogram, pretty frame all in one!


This is what the frame and contents looked like when I brought it home from Goodwill...perfect size, not too big, not too small. Looks funky....but oh the wonders of windex and spray paint!

Supply List: Frame from Goodwill, piece of fabric, craft paint!! Easy peasy!

After removing the contents and painting the frame I used permanent black markers to make the calendar grid on the BACK of the glass. Next, I designed the "monogram" on the computer, mirrored it, taped it to the FRONT of the glass and painted on the letters on the BACK using an ITTY BITTY paint brush and regular craft paint. SO MANY POSSIBILITIES!!! After everything was dry I reassembled the frame with a piece of cloth as the backing. SO PRETTY!!! The entire front surface of the glass is smooth and fully "windexable" , as all the paint and grid are inside the frame now.


Finished! Now just need to add some fun EVENTS!


That's better!


Happy Holidays everyone! I'll post LOTS more homemade gifts AFTER Christmas...when they're all opened and home with their new families!! :-)

Visit Kim over at NewlyWoodwards to check out LOTS of VERY COOL handmade gifts!


Thursday, December 3, 2009

Glitter, Where Have You Been All My Life?


I love Santa. Who doesn't love Santa? Apparently Hancock Fabrics doesn't love Santa. Okay, maybe that's too harsh...I'm sure they love him....just not if he has a booboo. As I was shopping my big three (Goodwill, REstore, Hancock) one Saturday not too long ago I came across this little guy. There was a nick in the base (nothing a little Sharpie action couldnt fix) and the last S was hanging on by a sliver (again, nothing a little glue couldn't fix) I thought it was cute and for $2, it was definitely going in my cart....well first I put it back on the shelf, thinking I don't really need this....then cruised around the store a little more....then rushed back, hoping no one had snatched up my gem and clutched it to myself like a thief in the night. THEN I SAW THE ORIGINAL PRICE! TWENTY FIVE DOLLARS PEOPLE! Okay, first of all, who spends $25 on stuff like this? Seriously? So that is a savings of what? 963%? I don't know, my math guy is at work right now. But it was a deal.
So it came home, sat in the basement a couple weeks....then it hit me! Glitter!! Blogland is all abuzz with glitter these days and I hadn't actually used glitter since...hmm.....4th grade maybe? I'm addicted...seriously addicted. I'll be adding glitter to my list for Santa....it comes in so many beautiful colors.....and Queen Martha has a line of glitter at Michael's that is TO.DIE.FOR. End of story.
Isn't it pretty now!
Santa also wanted to hang with the books....and away from little hands that LOVE SANTA!!! Especially sparkly glam Santa. :-)

You Say Fireplace, I Say Mirrorplace


I have to begin by saying this is almost the project that wasn't. After nearly 5 years sitting in our basement, this mirror almost got the heave ho. It was the partner to a very large dresser I had in my room growing up. Had that extra brownblack grainy wood look, curvy early 1980's lines, huge expanse of mirror....was TERRIFIC when I was attempting to hairspray my hair to new heights at age 13....but in my grownup house I just couldn't make it work anywhere...such a shame I thought.

THEN....an epiphany. I'm sure I was sleeping or showering....that's when most of my epiphanies happen...basically the two times of day no one is asking me for fruit snacks, a milk refill or to race hot wheels.

MY MIRROR COULD BE THE FIREPLACE I'VE ALWAYS WANTED.

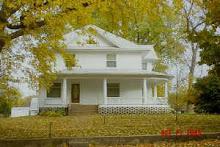
Don't get me wrong, I think our house is WONDERFUL. It has everything we had on our wishlist, a front staircase AND back staircase, lots of bedrooms, a gorgeous wrap around porch...I died and went to house heaven. BUT...no fireplace. Which in reality is a good thing....it would just give me one more thing to worry about.

And don't you know i got so excited to start on my mirrorplace that I forgot to take a "before shot". Just imagine in your mind's eye a dark wood behemeth of a mirror with little shelves going up the sides, etc...you can sort of see it in this pic..First, after staring at the mirror for approximately 763 hours trying to decide how in the heck I would turn this thing into a fireplace IT.HIT.ME. Turn it upside down! Well duh....wish that would have hit me approximately 762 hours ago. The top, now bottom, had a big crown moulding...perfect to sit on the floor! Then I started scrounging the basement (and the REstore...okay, okay I admit it) for odds and ends. Added some wood here and there, chopped off that curvy part.....and VOILA!


I also picked up another cabinet door while perusing the REstore....spray painted it red (with paint from the REstore ..I know, I have a problem), painted on the Peace and there you go. The frame is a dumpster find from my dad....we're kindred spirits. :-) Everything else was free free cheap cheap!!! Free branchy garlands (boy that's a story in itself), big pinecones, shiny poinsettas, gold balls from Goodwill, more stuff from the yard (some recycled from Thanksgiving).
My dad will be so proud of me.

giveaways

Sunday, November 29, 2009

Dare to EAT COOKIES!!

Dare to DIY


Week 3....we're daring to.....EAT COOKIES!!! I really didn't need a dare to eat cookies...I do that at will....calories schmalories. And when Chocolate Crinkles are involved....well there just is no stopping me. I baked, I took photos, I ate.

These cookies are moist, lofty, melt in your mouth little pieces of chocolate heaven.


Betty Crocker Chocolate Crinkles

2 cups sugar

1/2 cup veggie oil

4 oz. melted unsweetened chocolate (cooled)

2 tsp. vanilla

4 eggs

2 cups flour

2 tsp. baking powder

1/2 tsp. salt

1 cup powdered sugar

Mix granulated sugar, oil, chocolate and vanilla. Mix in eggs one at a time. Stir in flour, baking powder and salt. Cover and refrigerate at least 3 hours.

Heat oven to 350. Roll teaspoon sized balls of dough, roll around in powdered sugar. Place about 2 inches apart on greased cookie sheet. Bake til firm...10-12 minutes.

Yield 6 dozen.

Be sure to head over to see Kim at the NewlyWoodwards and check out all the YUMMY treats!

Sunday, November 22, 2009

Thanksgiving Table...Free, Free, Cheap, Cheap


Dare to DIY


Week 2...Let's Party! This week we're "Daring to Entertain".....well....we were planning to entertain, but had a change of plans. The table was already set and my creative juices were flowing, so what the heck, I just kept setting and setting until it was done.....to be taken down tomorrow to make way for the CHRISTMAS TIDAL WAVE!! My sweet husband has already put up the "foyer tree" for me...so we have a little holiday overlap in our house right now.

Back to the party!

On a recent trip to the Restore I spotted this little beauty. What is it, you ask? I have no clue. BUT....it instantly shouted to me "I'M YOUR CENTERPIECE!! PUT ME ON TOP OF THAT GIANT TEETERING PILE YOU'RE ALREADY CARRYING!" Yes, it was a demanding piece of cabinetry or whatever it is, so it got it's way. (and yes, things often shout at me when I'm at the Restore or Goodwill......my husband would like me to wear earplugs ;-)


This is what it looked like, AFTER a dusting, PRIOR to a coat of my favorite gloss chocolate brown spray.

And in it's new life as my centerpiece....I think this is what it was meant to be. Worth every penny of the $2 I spent on it. Filled with things from our yard...bittersweet, lilac branches, dried hydrangeas (sprayed gold), Chinese elm, and flowering kale. Gotta love free!!

Darn it....the lighter AND my husband's bike ended up in this shot! But I still like it, so it stays!

Gobble gobble....I have a thing for turkeys this year.


Free, free, cheap, cheap! All the china is hand-me-down or Goodwill. LOVE the crystal...gobbled it all up at Goodwill recently!! 25 cent pumpkins from a "super store". Silverware was a wedding gift. Everything else was gathered in the yard.
See you at the next party!
Check out all the great tablescapes at NewlyWoodwards!


Sunday, November 15, 2009

Do It Yourself Thanksgiving Decor

Dare to DIY

It's a blog party! This is my very first and I'm so excited to post my little projects! Thanks to Kim for getting us all motivated to spruce up for Thanksgiving. So here goes....

I'm more of a "before and after"kind of girl....hope you don't mind there are no "in progress" shots...I just plain stink at taking photos mid-process!

The Goodwill Cornucopia
Found this little cutie on a recent Goodwill spree. It was nice, but just not quite right....until a little spray paint saved the day. Excuse the horrendous photo of this one....just never seems to be the right light in our living room.Before...a perfectly respectable cornucopia....but.....

....that's better.

The Window Seat
For over a year our GORGEOUS...DOUBLE GORGEOUS...LOVE THEM SO MUCH I WOULD EAT THEM IF THEY WEREN'T MADE OF WOOD built in bookcases have been finished. Thanks Dad!!!! At one end is a charming little window seat...but the poor thing never got a cushion or even a single pillow...just a heap of little boy toys. Well that all changed my friends!!


Okay, okay...this shot is a little scary. Looks like some kind of fabric crime scene...I can hear the Law and Order theme song right now....anyway, this pile of...of....well stuff turned into this!! And the great thing about being thrifty is it makes a person ingenuitive...or at least that's the one I'm sticking with. I didn't have enough fabric to cover the entire windowseat cushion, so I covered one side in this yummy cream velvet and the other side in a smooth neutral print, so it's REVERSIBLE! YAY!

And lastly...but not leastly...
The Sign
On the very same overly indulgent day that I rescued the cornucopia from Goodwill I just happened to stop at the REStore as well...it was my lucky day folks. (Not according to my husband... some people, sheesh)
This cabinet door CALLED my name...it did....I really mean it. Along with enough other things that I was teetering a big pile all the way to the checkout...including the piece de resistance that I will debut next week....
Back to the task at hand. The door required a little sanding, a little wood putty, some paint and voila!Before
After...LOVE IT!!!! I painted the door with a satin finish...Cove Blue I think it was called...gotta love the paint at the REStore! The "thankful" part was the result of pouring a little of this and a little of that together, letting it dry, then sanding it down a little for a distressed look.

Be sure to head over to visit Kim at NewlyWoodwards to check out all the great projects!!
Related Posts with Thumbnails