

 Be forewarned...if you have unwanted wallpaper in your home and you read this post....you may fall in love with me. Just so you know. As part of the "grand" kitchen remodel we are now undertaking (small squeal), there is a great deal of wallpaper to eradicate. Luckily, early in our homeowning experience I came across this mixture....and it saved my sanity.
 Now squirt the wallpaper. If it's the really old kind just squirt it right on and let it soak a couple minutes. If it's the shiny "modern" kind just try to grab an edge and tear some of the shiny off, then squirt.


 BHG
BHG
 I can thank Kim over at Newly Woodwards for this beauty.....ever since seeing this photo this has been my only option for an island. This is it. I'm ordering the legs and figuring out how to build this. I.NEED.THIS.TABLE. Period.


 Lesson #7: Use plastic. LOTS of plastic.
 LAST TRAIN TO CRAZY TOWN....ALLLLLL ABOOOOARD! Toot toot. Okay, so you knoooow how I saaaaid the project might happen in a while. You knooooow, the kitchen project? Welllllllll. You were all so motivating. And I have a history of "wildhairedness disease". My husband still loves me...isn't he great.
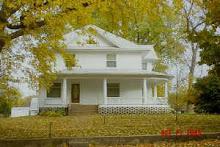
Yesterday I was thinking about my $50 entryway remodel...do you remember? The room that is adjacent to that entry is this little hallway. Should be an easy remodel too, right? Maybe I'll start there and work toward the kitchen (the next adjacent space).

This is the view from the backdoor. See that dropped ceiling in that tiny hallway?
 This is it close up.
 Does your kitchen have three exits? Ours does....we're all about safety folks. ;-) The door on the left goes to the backdoor, the door in the middle goes up the back stairs and the door on the right goes to the dining room. Now you have the layout.
 Well......yesterday I thought I'd peak at what was up above the hallway drop ceiling. I started with this little hole.
 Then....I made the hole a little bigger and used my highly superior investigative tool (my camera)....and pushed it through the hole to take a photo....THIS IS WHAT I FOUND!!! Can't tell what that is? A perfect plastered ceiling above the drop. WOOHOO!!!
 Sometimes investigations happen before you can even get your shoes on. He he he.
 This is the view above the drop pointing toward the backdoor!!! BEADBOARD!!!!
 The hole got a lot bigger.....and then the whole drop ceiling disappeared. How did that happen? It wasn't my fault. ;-)
 Then the framing disappeard too. Poof.
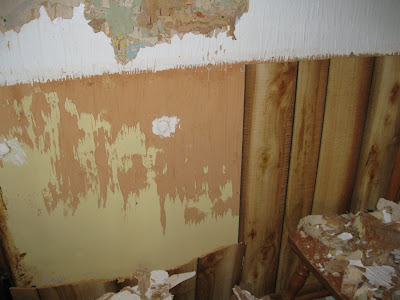
 The next AWESOME discovery was that the frosting finish on the walls was OVER THE TOP OF 73 LAYERS OF WALLPAPER. That might sound like bad news to the rest of the sane world, but that means it peels right off.....it's not plastered on my pristine plaster walls.
 When I say 73 layers I'm not kidding folks.....I seriously just gained us a half an inch of livable space in our home. Did you know wallpapering was usually part of the spring cleaning plan of gals in the era my home was built? They put up a new layer over the old every year.
 THEN the ugly paneling had to go. It was impeding progress.
 Isn't that better? It's very tough area to photograph....if you really want to take in it's grandness just stop by. The tiny hallway is no longer claustrophobic.
 Soooooo......that got me to thinking. What is above the kitchen's drop ceiling? The hallway was easy peasy. I'll just take a little look.
 Umm......somehow the hole got a little bigger than small.
 LOOK AT THAT CEILING!!!! Down comes the rest this week. Updates to follow...if I don't drown in blown in insulation (dirty filthy blown in insulation) But it's worth it....my kitchen is going to be beautiful!!!!
The big dumpster is on it's way.

